Responder Customer Outage Portal Configuration Guide
The following steps will help you configure the Customer Outage Portal:
- Ensure that you have met the technical experience and software requirements detailed in the Customer Outage Portal document.
- Configure MXD and Publish Services
- Install Windows Service and Configure the Application
- Create ArcGIS Online Webmap and WebApp Application
Configure MXD and Publish Services
The PublicOutages.mxd file contains the layers to be published to an ArcGIS Online feature service. The feature layers included in the MXD are samples. You can add and remove layers as necessary to better suit your organization’s needs.
- Open the mxd document.
- In ArcMap create a folder connection to the pom.gdb folder.
- Update feature layers to point to the pom.gdb.
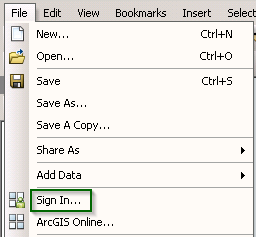
- Login to ArcGIS Online (File > ArcGIS Online).
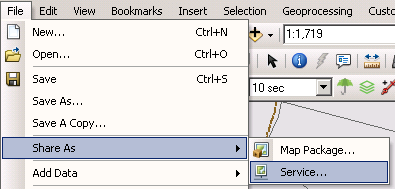
- Click File > Share As > Service.
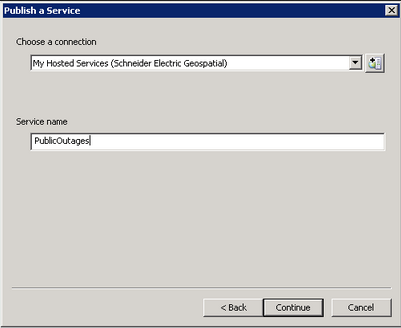
- Select Publish a service and click Next.

- Select My Hosted Services from the drop-down list, type a Service Name, then click Continue.
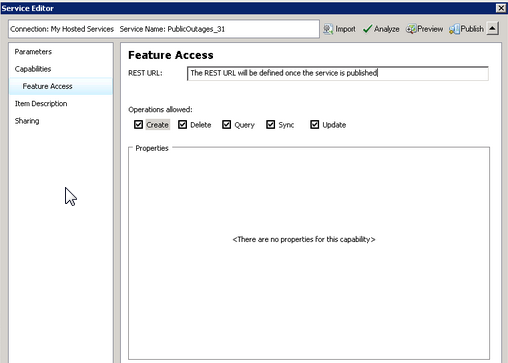
- Under Capabilities, select Feature Access and de-select Tiled Mapping. Under Feature Access, select Create, Delete, Query, and Update. These must be selected in order for the Windows Service to update the outage points as incident information changes.
- Analyze the service. Ensure that you correct any errors. Optionally, look at any warnings and correct those that you deem important. Re-analyze the service upon correcting issues.
- Click Publish to publish the service to ArcGIS Online.
- Verify the service has been published to ArcGIS Online.
Create ArcGIS Online Webmap and Web Application
To make incidents visible, you must create a Web Application that will use the published feature service.
- Access your organization's ArcGIS portal account.
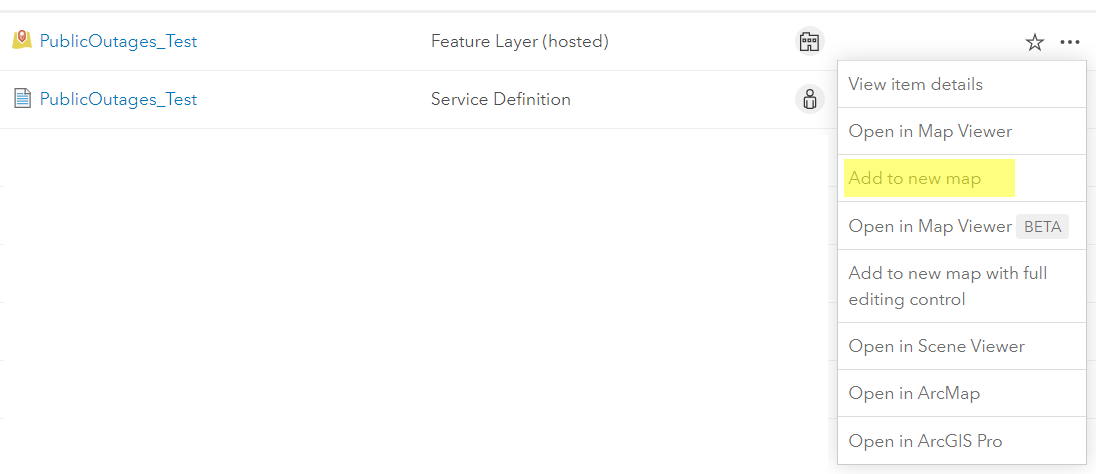
- Click My Content.

- In the Feature Layer row, click the 3 dots, then choose Add to New Map.
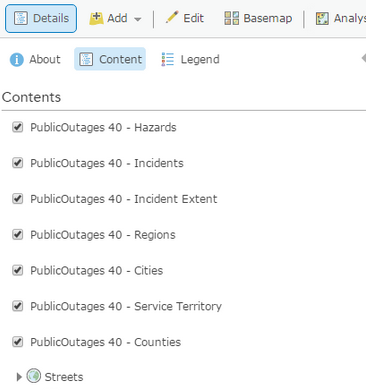
- Add the appropriate basemap to the webmap.
- Organize the Table of Contents to display the data according to your organization’s needs. Simpler is often better for users, so try to ensure that it is easy to use and read.
-
- Click Save. Type a map Title name, an appropriate Tag {these are required, and you can have multiples}, a Summary, and a Save location. Click Save Map.
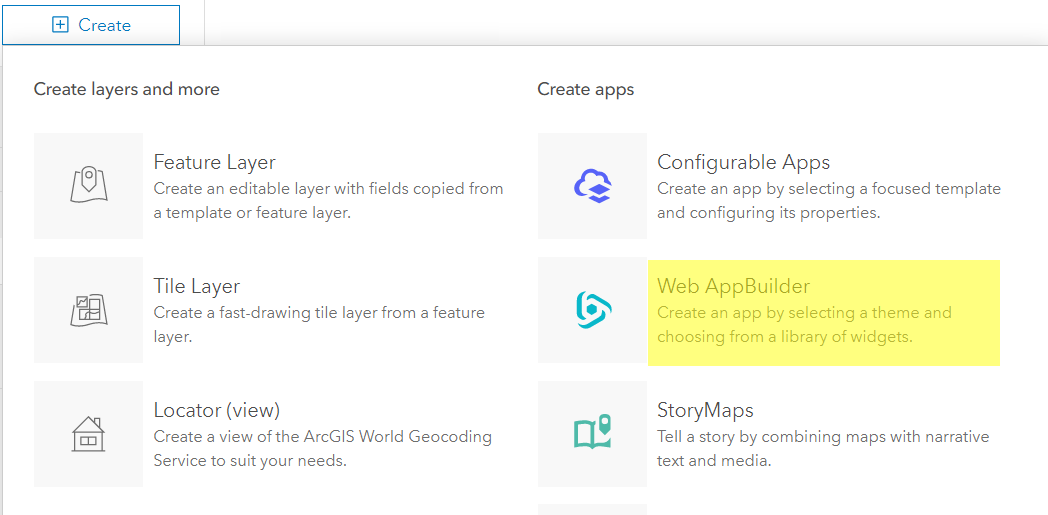
- In the Home dropdown, click Content.
- Select Create > Web AppBuilder.
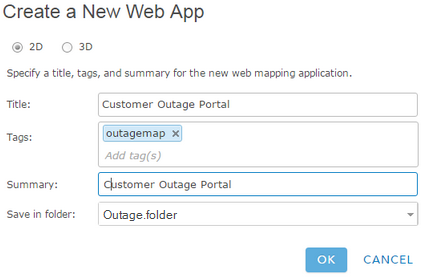
- Type a web app Title name, the tags entered when creating the map, a Summary, and a Save location. Click OK.
- Select an appropriate theme (we recommend Tab) and make any desired style and layout changes.
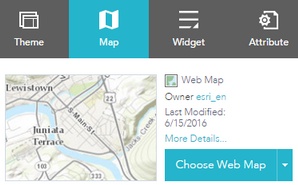
- Click Map > Choose Web Map. Select the newly created web map.
- Select the Attribute tab and provide the following:
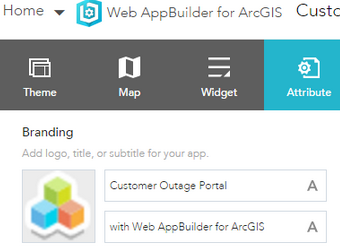
- Title: this text is typically the utility name.
- Subtitle: this text is typically the phone number that your customers can call to report an issue.
- Logo: this image is typically your organization's logo.
- Optional: Add a link to configure access to the online outage notification form.
- Title: this text is the title of the link. Alternatively, you could embed an image using the <img src> tag.
- URL: this is the URL for the call submittal form.
- Save your changes.
- Share the web application with Everyone and embed its address in your corporate web site, preferably in the Storm Center or Outage center, if you have either. If the map will be only internal, then Sharing should be set to Organization, or authorize certain groups within your utility to view the map.
Install Windows Service
The Schneider Electric Outage Map Service is a Windows service that allows Responder to update the feature service, with the latest incident information, that you published in a previous step.
- Launch the installer. This installs the application and starts the Windows Service.
- Verify the Windows service is installed and running.
- Open the browser of your choice and access the configuration site http://localhost:16637 (or use the port that was specified during the installation process). Alternatively, access All Programs > ArcFM Solution > Responder and select the Outage Map Configuration Page shortcut.

- Inspect the Status page to ensure there are no errors resulting from starting the service.
Configure the Application
- Click Configuration. Configure the application as needed. Each option has a tooltip to explain its purpose.
- Save each configuration section upon making changes.
- Restart the Outage Service.
ArcGIS/Portal section
- Service URL: The URL of the published map. To obtain the URL, in ArcGIS Portal, navigate to My Content, and click on the Feature Layer. Make sure the ending / is included in the address or an error may occur about the URL. The bottom right displays the URL, e.g.: https://services.arcgis.com/s91pPWtevN3bOiXW/arcgis/rest/services/PublicOutages_1021/FeatureServer/
- Token Service URL: The URL of the ArcGIS Online token service. The default is https://www.arcgis.com/sharing/rest/oauth2/token/ The token URL also needs an ending / in the address when adding it into the configuration.
- Geometry Service URL: We recommend enabling the Geometry Service in your ArcGIS Server. The Geometry Service provided by ESRI can also be used but it is less reliable. If you wish to use ESRI's Geometry Service, the URL is:
http://tasks.arcgisonline.com/ArcGIS/rest/services/Geometry/GeometryServer/
To enable the Geometry Service in your ArcGIS Server, navigate to Manage Services, then Utilities. Click the Start button for the Geometry Service.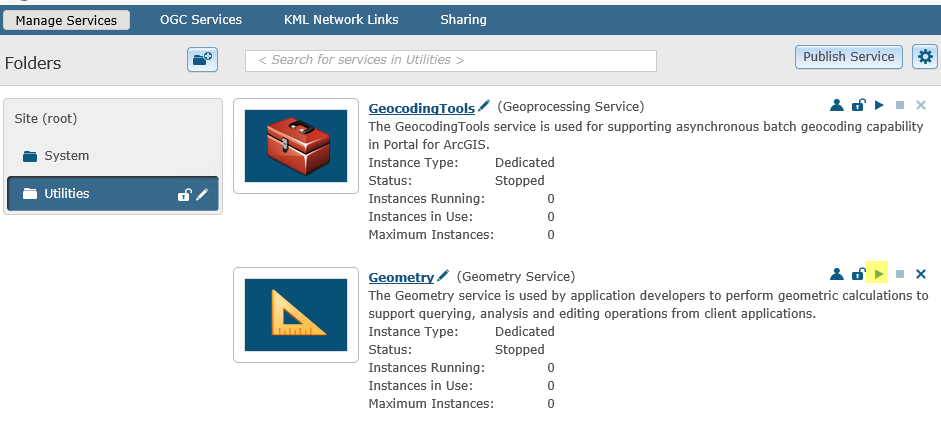
In the Geometry Service configuration setting, replace {YourArcGISServerHere} with your ArcGIS Server URL. Make sure the ArcGIS Server is enabled to support SSL, and the port is included in the Geometry Service URL. - Project Points: If True (default), outages are displayed on the map. If False, no outages are displayed.
- In Spatial Reference: The spatial reference in which the input is placed. It is used by the Geometry Service for projections. The incoming points are from Responder. The default is 2238.
- Out Spatial Reference: The spatial reference to which the incoming points are projected to by the Geometry Service. The default is 102100.
- BufferDistance: Distance to buffer outage points to. This determines how large the polygon is in the Incident Extent. The default is 50.
- SplitSize: The precision of the minimum bounding polygon in the Incident Extent. Ignored if Generalize Extent is true. The default is 2.
- Generalize Extent: If True, the Incident Extent is displayed as a rectangle.
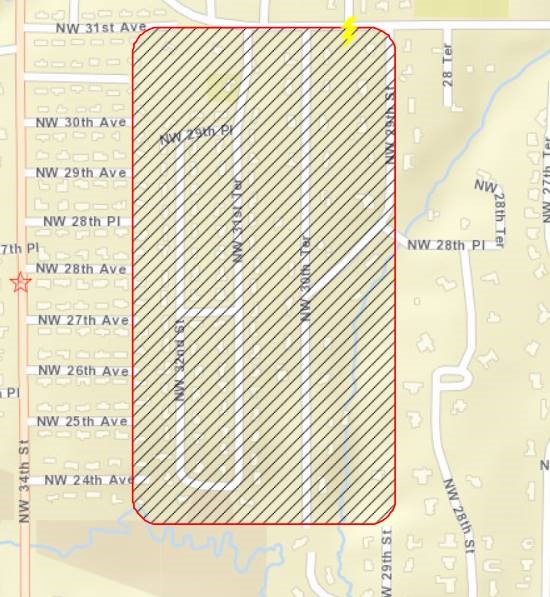
If False (default), the Extent is displayed as a polygon that shows the general area of the outage. 
- Decimal Digits: This setting is used to round up values with multiple decimal digits. For example, the coordinate value 123.456789 is rounded to 123.46. The default is 2.
- Pass Token to Geometry Service: This is used in cases where a token is required by the Geometry Service. For example, the Geometry Service may be secured or federated with Portal. The default is False.
- Client ID: Refer to the ESRI documentation to determine your Client ID.
- Client Secret: Refer to the ESRI documentation to determine your Client Secret.
Layer Name Sections
Layer names must match the name given to the layer in ArcGIS Online. If you change a layer name in either of these places, you have to change it in the other location as well or the layers won't load properly.
Responder Configuration
- Computer Name: The location of DataServices. Should be “.” if Outage Portal is co-located with Responder.
- Decimal Digits: This setting is used to round up values with multiple decimal digits. For example, the coordinate value 123.456789 is rounded to 123.46. The default is 2.
- Min Duration Time: The minimum duration an outage must exist before it displays on the map. The default is 5 minutes.
- Min Hazard Duration Time: The minimum duration a hazard must exist before it displays on the map. The default is 5 minutes.
- Min customer count: The minimum number of customers that must exist on an outage in order for it displays on the map. The default is 10.
Outage Service
- Refresh interval: The amount of time to wait before checking for new or updated outages. The default is 20 minutes, and the minimum is 5 minutes.